


BLOG
How to Speed Up a WordPress Website: A Practical Step-by-Step Guide
4 min read
Matrix is proud to join PACE, now launched in Moldova. The Erasmus+ project strengthens youth organisations across the region with training, digital resources and collaboration to support displaced Ukrainian young people.
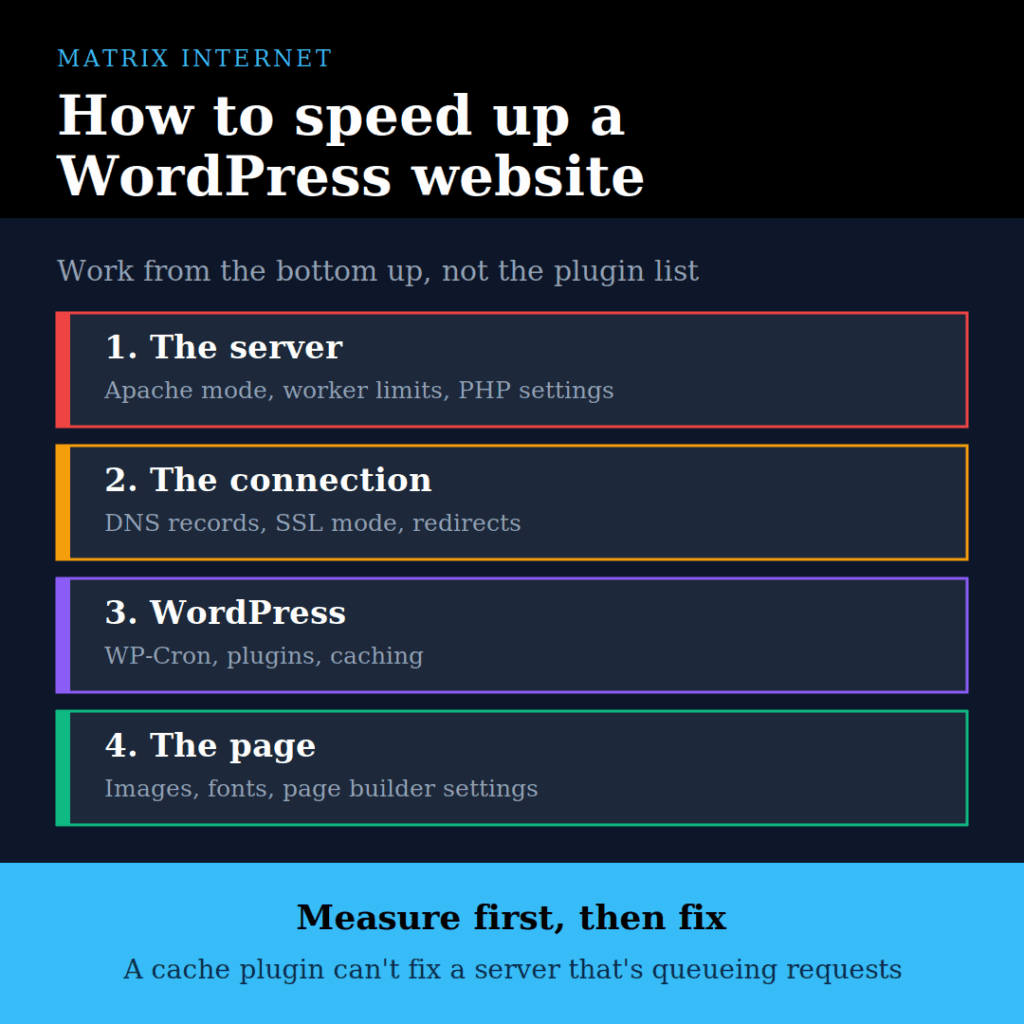
Most WordPress speed guides start with plugins. But a cache plugin can’t fix a server that’s queueing requests, and compressing images won’t help if the connection hangs before anything loads.
This guide works from the bottom up: measure first, then fix the server, the connection, WordPress, and finally the page itself. Each step includes how to check it and how to fix it.
Step 1: Measure Before You Change Anything
Guessing wastes time. Doubling a server’s size or installing three cache plugins rarely helps if you don’t know where the delay is.
Time the page itself. On a Mac or Linux terminal:
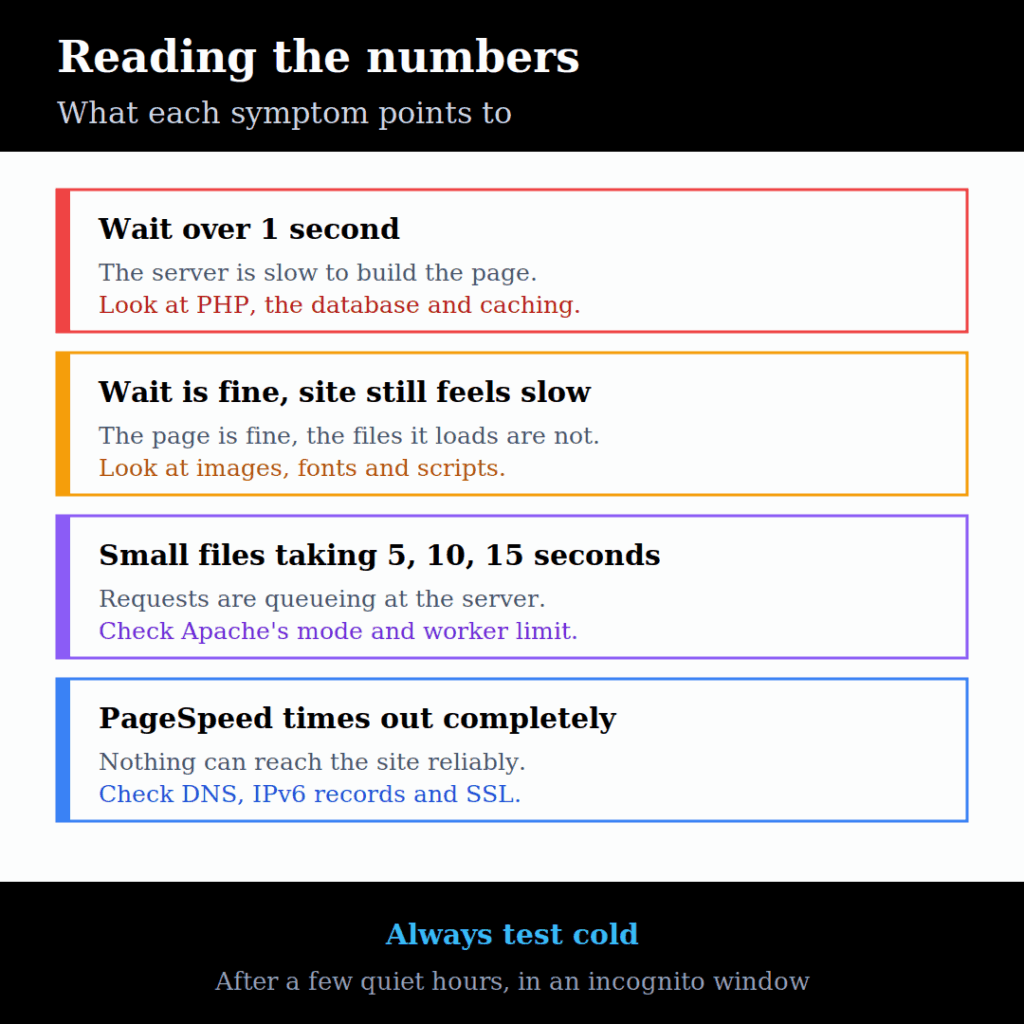
curl -so /dev/null -w "DNS: %{time_namelookup}s\nConnect: %{time_connect}s\nSSL: %{time_appconnect}s\nWait: %{time_starttransfer}s\nTotal: %{time_total}s\n" https://www.example.com- Wait over 1 second: the server is slow to build the page.
- Wait under 0.5 seconds, but the site still feels slow: the problem is in the files the page loads, not the page itself.
Watch a real first visit. curl only fetches one file. Browsers load dozens at once, so some problems only show up there.
- Open Chrome in an incognito window.
- Open developer tools (Cmd + Option + I on Mac, F12 on Windows) and go to the Network tab.
- Tick Disable cache, and make sure the filter is set to All.
- Load the page and sort by the Time column.
Look for small files taking seconds, rows marked failed or pending, and 301 redirects.
Test when the site is “cold”. Many problems only appear on the first visit after a few quiet hours. Test then, not straight after you’ve been working on the site.
Run PageSpeed Insights for a list of specific issues, and to see how the page scores against Core Web Vitals. If it fails completely with ERR_TIMED_OUT, you have a connection problem (see Step 3), not a page problem.
Step 2: Check the Web Server
This is the most overlooked step, and it can be the biggest win.
Look for a request queue
If tiny files (1–5 KB) take 5, 10, 15, 20 seconds in neat steps, requests are waiting in a queue. The server only lets a few in at a time.
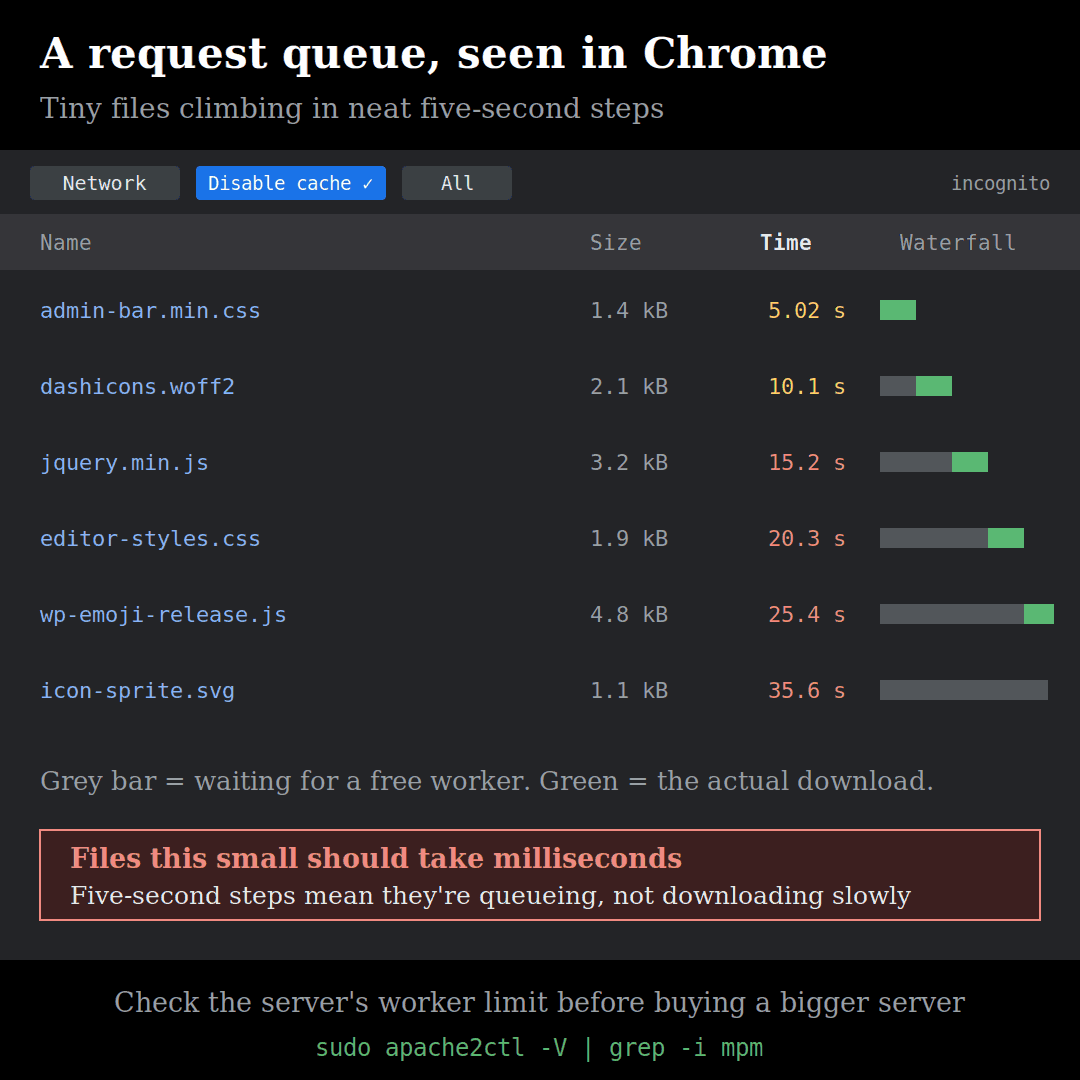
On Apache, check the mode and limits:
sudo apache2ctl -V | grep -i mpm
sudo grep -rn "MaxRequestWorkers\|KeepAliveTimeout" /etc/apache2/ | grep -v "#"
If you see prefork with a low MaxRequestWorkers (like 5), that’s your bottleneck. Some preconfigured server images, including Lightsail’s newer WordPress instance, ship this way to save memory.
Switch Apache to event mode with PHP-FPM
In prefork mode, every request, even a small image, takes up a heavy worker. In event mode, static files use lightweight threads and only PHP pages go to a separate PHP-FPM pool.
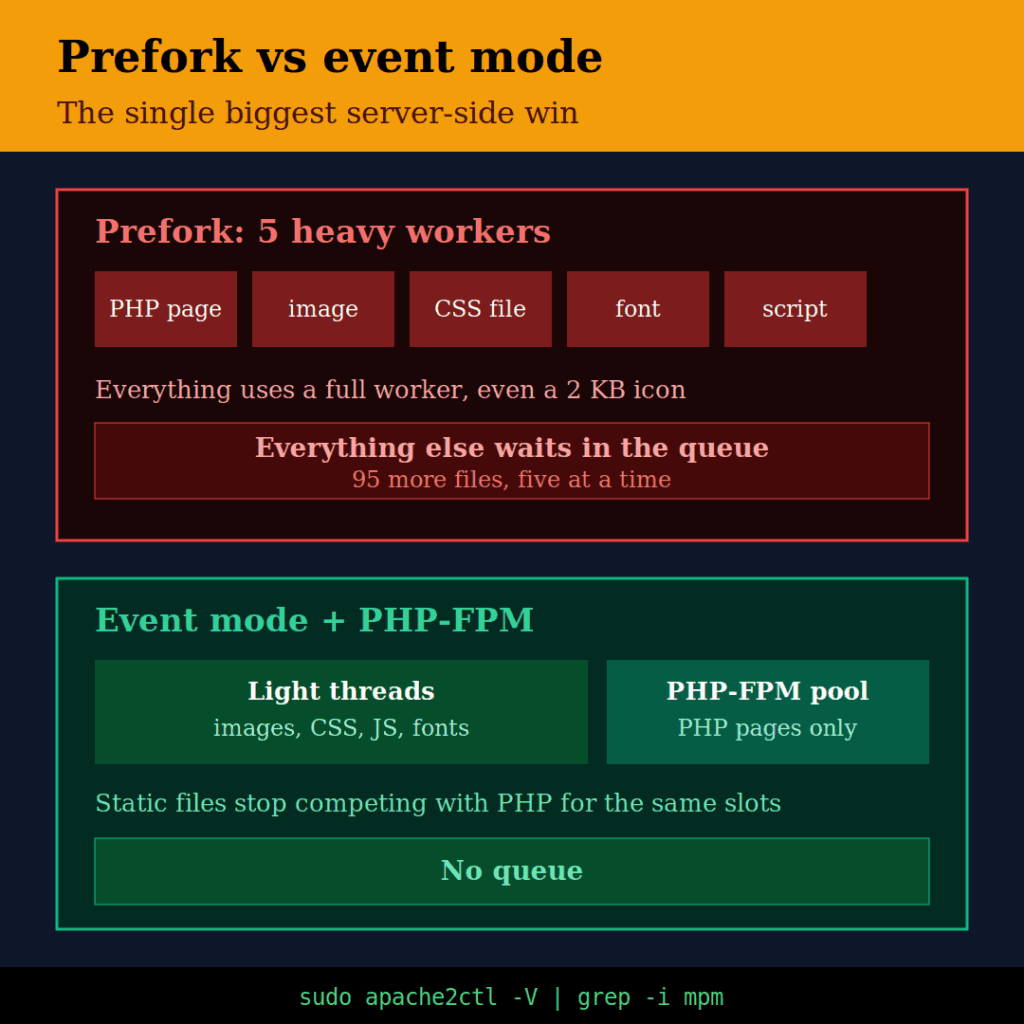
On Debian or Ubuntu with PHP 8.2 (swap in your PHP version, from php -v):
sudo apt update && sudo apt install -y php8.2-fpm
sudo a2dismod php8.2 mpm_prefork
sudo a2enmod mpm_event proxy_fcgi setenvif
sudo a2enconf php8.2-fpm
sudo systemctl enable --now php8.2-fpm
sudo apache2ctl configtest && sudo systemctl restart apache2
To undo it if anything breaks:
sudo a2dismod mpm_event proxy_fcgi && sudo a2disconf php8.2-fpm
sudo a2enmod mpm_prefork php8.2 && sudo systemctl restart apache2
If you’d rather stay on prefork, at least raise the limits. On a 1 GB server, 12 workers and a 2-second keep-alive is a safe starting point.
Match your PHP settings
PHP-FPM reads its own settings file (/etc/php/8.2/fpm/php.ini), not the one Apache used. Check for differences before you test:
grep -E "^(memory_limit|max_input_vars|post_max_size|upload_max_filesize)" /etc/php/8.2/apache2/php.ini /etc/php/8.2/fpm/php.ini
diff <(ls /etc/php/8.2/apache2/conf.d) <(ls /etc/php/8.2/fpm/conf.d)
Page builders like Elementor need more than PHP’s defaults. Sensible values:
memory_limit = 256M
post_max_size = 16M
max_input_vars = 3000
max_execution_time = 300
If a line starts with ;, it’s switched off. Remove the ; on the lines you change. Then restart:
sudo systemctl restart php8.2-fpmDon’t upgrade the server until you’ve checked
If doubling the CPU and memory doesn’t help, the problem is a limit or a setting, not a lack of power. Keep an eye on memory with free -h. As long as “available” stays above about 150 MB, you’re fine.
Step 3: Check DNS and the Connection
Remove AAAA records you don’t need
If your DNS has AAAA (IPv6) records pointing at a server whose IPv6 address isn’t static, they can end up pointing nowhere after a resize or rebuild. Connections that try IPv6 hang until they time out, which looks like a random 30-second load.
If you’re behind Cloudflare’s proxy, you don’t need AAAA records to your server at all. Cloudflare serves IPv6 visitors itself and talks to your server over IPv4.
Use the right SSL setup with Cloudflare
- Set SSL/TLS to Full (strict). “Flexible” causes redirect loops on WordPress.
- Consider a free Cloudflare Origin Certificate on the server. It lasts 15 years and doesn’t depend on Let’s Encrypt renewals, which can break when a server is copied or resized.
- Turn on Always Use HTTPS so
http://visits go straight to HTTPS.
Pick one address and redirect the rest
Choose www or non-www and 301-redirect everything else to it: the other version, http://, and the bare IP. Every extra redirect is a wasted round trip, and two loading versions of the site is bad for SEO. If you’re mid-migration, our guide on moving a website without losing rankings covers redirects in more depth.
Step 4: Fix WordPress’s Background Work
Move WP-Cron to a real timer
WordPress runs its scheduled tasks (update checks, clean-ups) when a visitor loads a page. On a quiet site, the first visitor after a long gap waits for all of it.
Turn that off in wp-config.php:
define( 'DISABLE_WP_CRON', true );Then run the tasks every 5 minutes from the server instead:
sudo apt install -y cron
sudo crontab -u www-data -e
Add:
*/5 * * * * cd /var/www/html && /usr/local/bin/wp cron event run --due-now >/dev/null 2>&1Adjust the path to your WordPress folder, and check where wp is with which wp.
Let the server talk to itself directly
WordPress regularly calls its own address. Behind Cloudflare, those calls go out to the internet and back, and can get caught by bot protection. Point your domain at the server itself in /etc/hosts:
127.0.0.1 www.example.com example.com
::1 www.example.com example.com
Check it with getent hosts www.example.com. It should show 127.0.0.1 or ::1.
Remove plugins you don’t use
Every plugin adds code to each page load. Some, like Jetpack, also call outside servers regularly. If you only use one feature of a large plugin, look for a lighter alternative. While you’re in there, make sure what’s left is up to date — our guide on updating plugins safely covers doing that without breaking the site.
Step 5: Add Caching
Page caching
A page cache plugin saves a ready-made copy of each page, so WordPress doesn’t rebuild it for every visitor. Keep it simple:
- W3 Total Cache: turn on Page Cache (Disk: Enhanced) and Browser Cache. Leave Minify, Database Cache and Object Cache off. Minify often breaks Elementor layouts.
- WP Super Cache: a simpler option. Turn it on and keep the defaults.
If the plugin asks for FTP details or can’t write files, it needs permission. Add these to wp-config.php:
define( 'WP_CACHE', true );
define( 'FS_METHOD', 'direct' );
And give WordPress ownership of its content folder:
sudo chown -R www-data:www-data /var/www/html/wp-contentCloudflare caching
Cloudflare caches images, CSS and JavaScript, but by default often only for 4 hours. After that, the next visitor waits while every file is fetched from your server again.
- Go to Caching → Configuration and set Browser Cache TTL to 1 month or 1 year.
- Go to Caching → Cache Rules and create a rule: if the URI path contains
/wp-content/or/wp-includes/, set Edge TTL to 1 month.
Updated files don’t get stuck, because WordPress adds version numbers to CSS and JS files (?ver=4.3.4). If you replace an image under the same name, use Purge Everything.
Check it works by running this twice. The second result should say HIT:
curl -sI https://www.example.com/wp-includes/js/jquery/jquery.min.js | grep -i cf-cache-statusStep 6: Make the Page Lighter
Elementor settings
In Elementor → Settings → Performance:
- CSS Print Method: External File
- Optimized Image Loading: Enable
- Optimized Gutenberg Loading: Enable
- Lazy Load Background Images: Enable
- Load Google Fonts Locally: Enable
- Element Cache: 1 week
In the Features tab, set Inline Font Icons and Optimized Markup to Active. Avoid experiments marked Alpha on a live site.
Then go to Elementor → Tools and click Clear Files & Data, so the changes take effect.
Images
- Resize images before uploading. Around 2000px wide is plenty for most layouts.
- Convert to WebP, either with a plugin like Converter for Media or before uploading.
- Check your logo. PageSpeed often flags a logo uploaded at 3–4 times the size it’s shown at.
Fonts
Fonts loaded from Google’s servers add an extra connection before text can appear. Loading them locally (see Elementor above) removes that step and helps with GDPR too, since visitor IP addresses are no longer sent to Google. If that’s a concern for your site, our GDPR compliance team can review how your site handles third-party services.
Step 7: Test Again
After each change, purge your caches (the plugin, then Cloudflare) and repeat Step 1:
- curl timings, direct to the server and through Cloudflare
- Chrome Network tab in incognito with cache disabled
- PageSpeed Insights
- A cold test after a few idle hours
Change one thing at a time where you can. That way you know what actually helped.
Quick Checklist
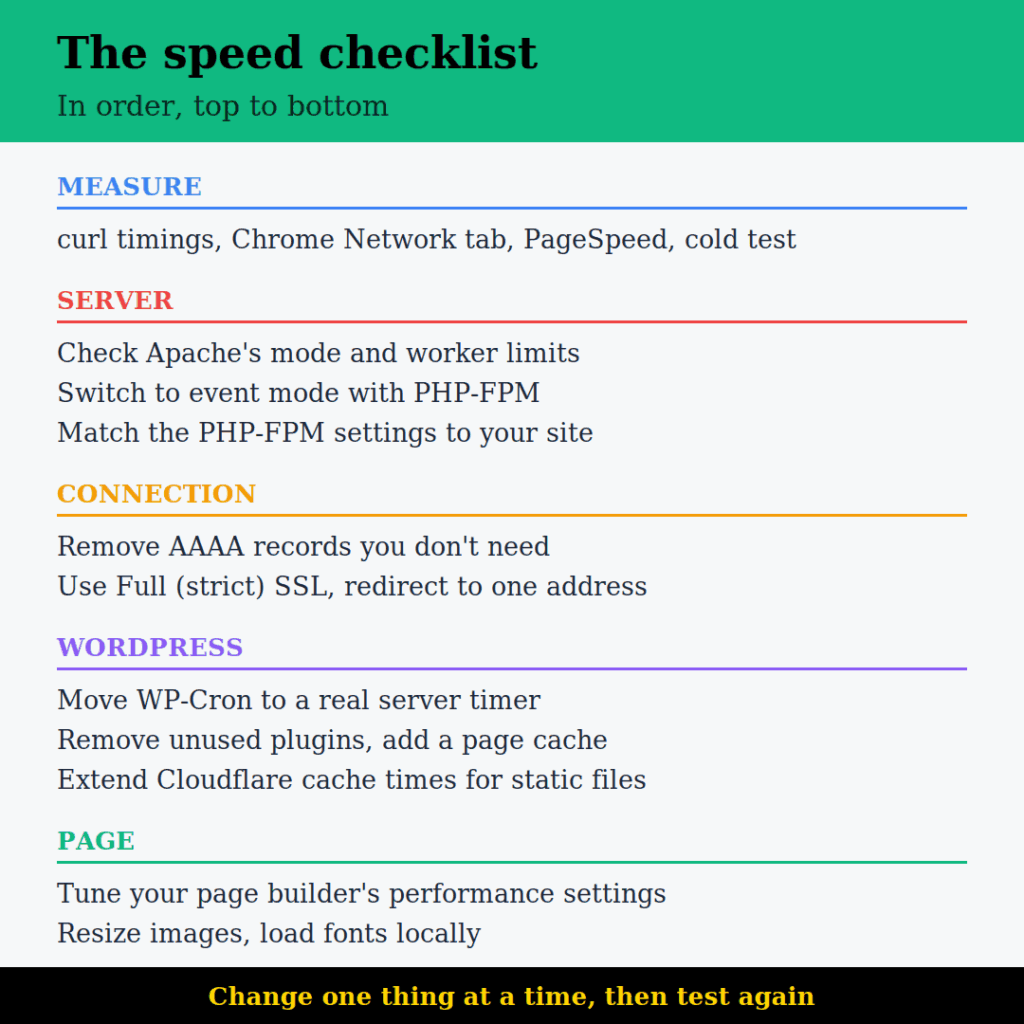
- Measure: curl, Chrome Network tab, PageSpeed, cold test.
- Check Apache mode and worker limits; switch to event + PHP-FPM.
- Match PHP-FPM settings to what your site needs.
- Remove unneeded AAAA records; use Full (strict) SSL.
- Redirect everything to one address.
- Move WP-Cron to a server cron job.
- Point your domain to the server in
/etc/hosts. - Remove unused plugins.
- Add a simple page cache.
- Extend Cloudflare cache times for static files.
- Tune Elementor performance settings.
- Resize and convert images; load fonts locally.
- Test again, cold.
If your site is slow and you’d rather not spend an afternoon in the terminal, the hosting team at Matrix Internet tunes and manages WordPress servers for businesses across Ireland, and our technical support team keeps them that way. If the site isn’t slow but down, start with our guide on why websites go down instead.
At Matrix Internet, our hosting and support teams keep WordPress sites fast — tuning the server configuration, caching and delivery so pages load quickly, and keeping an eye on performance as the site grows.
FAQs
Not if the problem is underneath it. A page cache stops WordPress rebuilding the same page over and over, which is a real win, but it only helps requests that the server manages to answer. If the web server is running out of workers, or every small file is waiting in a queue, a caching plugin simply hands cached pages into the same traffic jam. Install one by all means, but measure first. If your waiting time is low and the site still feels slow, caching and a lighter page are the right place to work. If small files are taking seconds each, fix the server before you touch a plugin.
Look at one number: how long the server takes to start sending the page. The curl timings in Step 1 give it to you directly as the wait figure, and Chrome's Network tab shows the same thing as the first part of each bar. If that wait is over a second, the server is slow to build the page and you should be looking at PHP, the database and caching. If the wait is a couple of hundred milliseconds but the site still feels heavy, the server is fine and the page is the problem — images, fonts, scripts and whatever your page builder is loading.
Because they are not loading slowly, they are queueing. A 1 KB stylesheet cannot take five seconds to travel down a connection, so when you see times climbing in neat steps like that, the files are sitting in line waiting for a free worker on the server. It usually means Apache is in prefork mode, where every request — even a small icon — occupies a full worker, and the worker limit is set low. Switching to event mode with PHP-FPM lets static files be served by light threads and keeps the heavy workers for actual PHP pages.
Check the configuration first, because more memory will not help a site that is limited by its worker count rather than its resources. Plenty of sites sit on servers with plenty of headroom while requests queue because of a setting in a config file. Run the checks in Step 2, look at whether the server is actually running out of memory or CPU under load, and fix what you find. If the server is genuinely maxed out after that — and especially if traffic has grown since it was set up — then upgrading makes sense. Doing it the other way round means paying more for the same speed.
On a quiet site it rarely matters. WordPress's built-in scheduler fires on page loads, so on a site with few visitors tasks run late and on a busy site they run constantly, adding work to visitor requests. If you have scheduled posts, backups, plugin updates or a shop sending emails, moving the schedule to a real server timer makes the timing reliable and takes that work off your visitors. It is a small change — disable the built-in scheduler fires on page loads, so on a site with few visitors tasks run late and on a busy site they run constantly, adding work to visitor requests. If you have scheduled posts, backups, plugin updates or a shop sending emails, moving the schedule to a real server timer makes the timing reliable and takes that work off your visitors. It is a small change — disable the built-in version in wp-config.php, add a server timer to call it instead — and on sites with a lot of plugins it is one of the easier improvements to make.
By Srdjan


